Workshop Projects
A functioning shop is more than just some big ticket machines, it also consists of a bunch of other stuff. I won’t bore you with all the details, but just a few of the highlights of my shop.
Think of the categories of everything in a shop:
· Facilities – the building and everything it takes to run the shop, like lights and power.
· Machines – big ticket items that are used to fabricate materials into parts, like a mill or a lathe.
· Fixtures – hardware to hold material being worked on, like rotary tables or vices.
· Tools – smaller machines, like grinders or hammers.
· Tooling – semi-consumable hardware used by machines (and tools) to affect the material, like end-mills or saw-blades.
· Supplies – consumables that facilitate the orderly operation of shop, like oil or rags.
· Materials – the raw stock that you start working on in a shop process – like bar-stock or plate-stock.
Fixtures and tooling are each pretty much for specific machines and tools, and materials are pretty much for specific parts, so I’ll go over each of those together, but I’ll touch on the rest here.
Facilities
I hate the idea of giving up my parking spot in the garage, but that’s all I got to work in, so I decided that’s what I had to do.
I thought a first-class shop ought to be clean, so the first thing to do was clean up. I emptied everything out, right down to the bare walls and floors, and scrubbed the floor and epoxy’ed it with a kit from Home Depot. It went down, pretty much according to instructions, and looks pretty good. I also sealed up the expansion joints so they wouldn’t collect dirt and debris.
Being as I began this whole adventure in the spring, it quickly become pretty hot out in the garage, so my next task was to work on that. I’ve made several improvements over time (so I didn’t do all of this in the beginning), but what I did was to put 1 1/2 inch Styrofoam for insulation in all of the panels of the (south-facing) garage door. That made a BIG difference in keeping the room from getting so HOT.

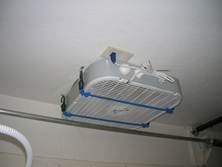
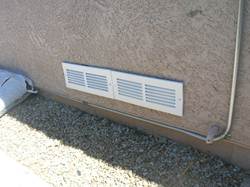
I also knew I’d need some pretty good ventilation but I didn’t want to make a lot of noise in the neighborhood, so I cut a hole in the ceiling for a forced-air fan, and built a baffle-box between it and a vent to the outside of the house. There is no discernable difference from the outside, but the fan moves a lot of air from one vent through the garage, and to back outside.
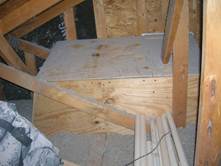

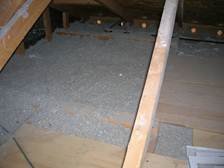
Most garage attics aren’t finished like the rest of the house, so I blew several inches of insulation into the attic and covered it with plywood so I could recover some of the storage space that I gave up in the garage.
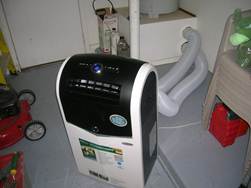
When I’m not doing stinky work (like welding) and wanted to work in comfort, I put a portable 1-ton HVAC unit that keeps the whole garage nice and cool in the summer and warm in the winter. That was quite a task to punch a couple holes for the outside vent for that thing as well.
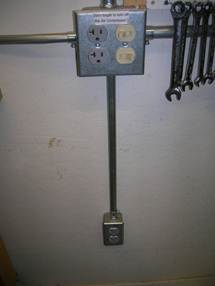
I wasn’t going to be able run any kind of machinery on the power outlets that were there before. I certainly didn’t want to put the house in danger of overloading the circuits, so I contacted a friend who is a licensed electrician to make sure my garage would be safe to run the equipment I had in mind. He said the best way for me to proceed was for him to instruct me what to do and for me to do all the work myself. I didn’t want to risk anything, but he assured me he would make sure I did everything right. I didn’t know it at the time, but what he did for me, besides teaching me a thing or two, was he saved me the trouble of a permit and inspection (not to mention the expense) by doing the work myself. He gave me specific instructions what to buy and do. I went and bought all the hardware (mostly from Home Depot again), and began the task. I didn’t want to tear into the walls, so all the electrical boxes and conduits are attached to the wall, but I ran it up through the attic to the power distribution panel just on the outside on the other side of the garage. He returned and inspected everything each step of the way before I bolted anything closed, and we tested the continuity just to be sure. It all checked out ok, so (I held my breath and) we wired it up to the circuit breakers, and he just smiled and said “Of course it works. You did a good job.” And that was that.

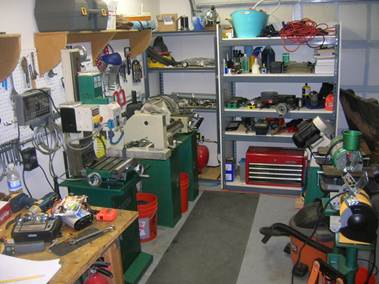
I also put up some peg-board and I was ready for some “stuff”.
My next task was to build a work bench. Doing metal work, I would have liked to have a steel table, but I didn’t have the wherewithal to build one, and I didn’t want to lay out several hundred dollars for one, so (again) I just went down to Home Depot and got a bunch of lumber and built a VERY sturdy (and large) work bench. As in any manly work bench, keeping it cleaned off is a constant struggle.
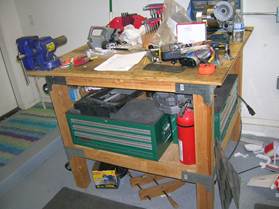
Also, notice the bench vice, tool drawers, and fire extinguisher – essential additions to any workshop.
Machinery
Meanwhile, I researched features and prices of machinery and tooling, and had a pretty good idea what I was going to get.
Now, one thing I need to make real clear from the first, is that my greatest resource for machinery, tools, materials, and processes is my son, John. He’s also my partner-insane in the Rocket project (see it in the Hardware Projects page). He is very experienced and skilled in mechanical and electrical design, and in the machine-shop – I couldn’t have done it without him. Check out his bio as well.
I knew that the scale of the parts and projects I imagined I’d be building was rather small, as machine-shop projects go, so I knew I wasn’t going to be shopping at the large commercial suppliers. John suggested I look around for some good used equipment, but I didn’t have the patience to shop the second-hand market. I selected Grizzly as the supplier of choice, because the broad spectrum of equipment they sold, their impressive service and support, their modest pricing, and the high marks given it by a large number of reviews and blogs.
My first shop purchase was a band saw. I understand it is a toss-up between that and a chop-saw, but I thought the band saw would be more versatile.

My next purchase was a welder. Now I spend a lot of money down at Home Depot and Lowes, and even sometimes at Harbor Freight, but I wanted to be sure to get the best quality machinery and tooling for my price pain-threshold. I went down to a welding supplier nearby, and decided that Miller was the hands-down best choice, so I got the smallest one they make. It looks like a little toy next to the big stuff they also make, but it is a very high-quality device, and they have provided me a wealth of support. They had me come in for an hour or two of personal instruction. I took a welding class in college a LONG time ago, so a refresher was very helpful – Home Depot certainly couldn’t have done that! I also discovered other friends that I didn’t even know were welders that also provided me a LOT of assistance in developing correct skills. I can honestly say I can lay down a pretty nice bead now.

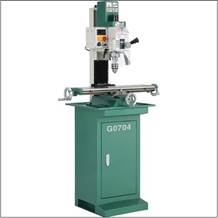
The most exciting purchase was the mill. That was the biggest single expense, and the object of the most research. It was the subject of a real debate in my mind, whether to spend a lot of money and load up on features, or save the expense and discover what I really need AFTER I develop some skills and experience in MY projects. I found that I could spend as little as a couple hundred dollars to countless thousands of dollars, depending on my requirements – well, that was the problem, my “requirements” were pretty vague – so opted for the lower-end approach. So far, I’m very happy with my selection, notwithstanding the features other systems offer.
No shop could be complete without a lathe, and I knew I had lots of parts that would require turning, so that was also a pretty exciting purchase. Like the mill, there are tons of options for features and pricing, but I used the same criteria for selecting my machines, and am quite please that I made a good decision in those.

Tools
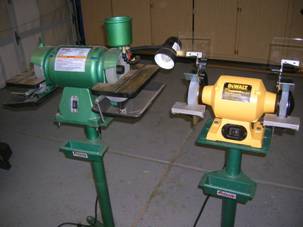
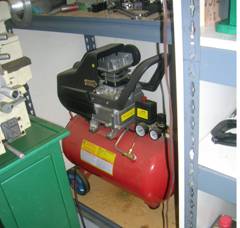
In the course of working on projects, I’ve accumulated quite a selection of tooling and other Tools and machines, like and air compressor, vices, grinders and cutters, not to mention storage shelves and drawers (and a bunch of other junk).
John (my son) told me a long time ago, to not presume that the purchase of a mill and lathe would be the end of the expenses – the tooling would quickly accumulate to be a greater investment than the original machinery. How true that is! There is just no end to the tooling and machinery upgrades I can think of that I just have to have! But I am very pleased with how my shop is outfitted, and am quite certain I can build anything I can design (ok, at least for now J)
Supplies
As you can see in the pictures, I have a few drawers and shelves to (try to) keep everything orderly. I have both terry-cloth rags and paper-towel rags, and I use them both. I have a modest inventory of other supplies like way-oil and cutting oil, and machining coolant.
In the spirit of open disclosure, I have to admit here, if you haven’t already inferred from reading my bio, that I have had absolutely no training or experience in a machine shop. Even in high school I spent all my time in the auto shop, and have worked as an auto mechanic for a few years. And although I studied Mechanical Engineering in college, my career has been programming computers. So, although I consider myself to be a first-class tinkerer and endowed with an aptitude for understanding all things technical, my only real experience with a shop has been watching engineers use the software I wrote for them to design and build what I always wish I would have been doing myself!